Kentucky Fried Chicken is a thing of the past to me. I don’t have beef with that fast food chain in particular – although that rat infestation at a downtown New York City branch a summer or two ago was pretty bad – but for one reason or other, that red-and-white bucket hasn’t graced my dinner table in many a moon. However, the memory of the Colonel’s secret 11-herbs-and-spices recipe is forever embedded in my brain and taste buds.
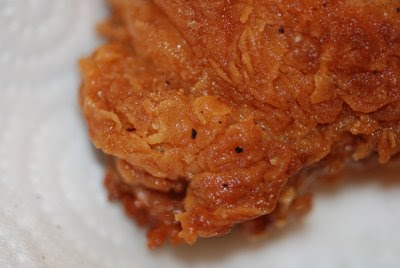
I’ve eaten fried chicken several times at my paternal grandmother’s house – pollo a la canasta (basket-style chicken – perhaps alluding to a picnic basket?) in local parlance – and it appeared every now and then at home. Also, there’s a chicken chain in Nicaragua called Tip-Top that built its fame on fried chicken, and once in a while on Sundays we’d have lunch there on our way to my grandparents’ house in Granada. All were good and had that homemade touch, but that was just the problem, they were very obviously homemade and lacking that extra-crispy skin. I wanted the Colonel’s secret.
None of my kitchens have ever witnessed fried chicken. I was always afraid of the stink all the frying would produce, I had concerns about flabby skin and undercooked chicken, I didn’t have a recipe I trusted, etc. etc. Fried chicken was just not an option. The closest I ever got was buying Tyson’s breaded chicken fingers. And I baked those.
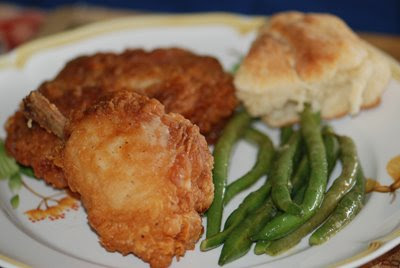
Last week, though, as people at work geared up for the long 4th of July weekend, I got a hankering for fried chicken. I don’t have a grill, so barbecue was out, and fried chicken seemed to be a very all-American, very apropos thing to make. I was so caught up in the idea that I didn’t even consider my previous fears and hesitations. And, as luck and fate would have it, I came across a special issue of Cook’s Illustrated titled “American Classics.” There on the cover, was the most beautiful, textured, mahogany-colored plate of fried chicken I’ve ever seen. There was no stopping me now; I would become the Colonel.
Preparation is a bit intense, but, so worth it. I made one bird and ate most of it – with the help of the husband – in two sittings. We miraculously had a leftover breast which we ate out of the fridge the next day and though not warm and as crunchy, it remained incredibly finger lickin’ good. Make it for a crowd – spread the love.
FRIED CHICKEN
Adapted from Cook’s Illustrated
As I mentioned above, the prep time is a bit lengthy, but cooking goes by in a flash – and it’s not smelly, believe it or not. Make sure you have at least one grid rack, and instant read thermometer.
½ cup plus 2 tablespoons table salt
¼ cup sugar
2 tablespoons paprika
3 medium garlic heads, cloves separated
3 bay leaves
2 quarts low-fat buttermilk
1 whole chicken (about 3 ½ pounds), giblets discarded, cut into 12 pieces (each breast cut in half crosswise, thighs and drumsticks separated, wings cut into two pieces)
4 cups unbleached all-purpose flour
1 large egg
1 teaspoon baking powder
½ teaspoon baking soda
3 – 4 cups refined peanut oil or vegetable shortening
-In large zipper-lock bag, combine salt, sugar, paprika, garlic cloves, and bay leaves. With rubber mallet or flat meat pounder, smash garlic into salt and spice mixture thoroughly. Pour mixture into large plastic container or nonreactive stockpot. Add 7 cups buttermilk and stir until salt and sugar are completely dissolved. Immerse chicken and refrigerate 2 to 3 hours.
-Remove chicken from buttermilk brine and shake off excess, discarding any garlic and bay leaf bits. Place chicken pieces in single layer on a large wire rack set over a rimmed baking sheet. Refrigerate, uncovered, for 2 hours. (You can refrigerate in for an additional 6 hours – just make sure you cover chicken with plastic wrap).
-Measure flour into large shallow dish. Beat egg, baking powder, and baking soda in medium bowl; stir in remaining 1 cup buttermilk (mixture will bubble and foam). Working in batches of 3, drop chicken pieces in flour and shake dish to evenly coat. Shake excess flour from each piece, then, using tongs, dip chicken pieces into egg mixture, turning to coat well and allowing excess to drip off. Coat chicken pieces with flour again, shake off excess, and return to wire rack.
-Line large plate with double layer paper towels. Heat oil (oil should be 2 ½ inches deep in pan) to 375˚F over medium-high heat in large 8-quart cast-iron Dutch oven with a diameter of about 12 inches. (I made mine in a 4-quart capacity and had no trouble – just make sure you can safely add the oil and chicken without causing an overflow).
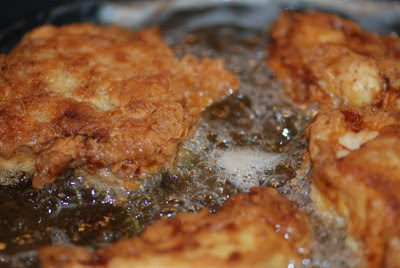
Place half the chicken pieces skin-side down in oil, cover, reduce heat to medium, and fry until deep golden brown, 6 to 8 minutes. After about 3 minutes, uncover the pan, lift the chicken pieces with tongs to check for even browning; rearrange the pieces if some are cooking faster than others. Check the oil’s temperature – at this point it should be at about 325˚F.
-Once the first side is deep golden brown, turn the pieces and cook the opposite side 6 to 8 minutes, uncovered. Transfer to paper towel-lined plate, allow to drain, then transfer to wire rack.
-Meanwhile, bring the oil back up to 375˚F and cook the remaining chicken in the same manner.
-Devour.