Author: MariaDelMar Sacasa

When Life Gives You Limes

I found a recipe for a “Key lime meringue tart” in a recent issue of Bon Appétit. The photo was gorgeous and the title sounded swank and modern. I’d been craving something citrus-y and custard-y and am crushing on meringues (despite years of gagging at the very sight of them)—it was fate. But, as I stared longingly at the picture and read the title over I recognized something I knew very well—I grew up on “Key lime meringue tart,” knowing it as “pastel de limón,” which technically translates into lemon pie. No swagger or bragging…Our recipe wasn’t ahead of the curve or attempting to reinvent the classic. The fact is, there are no lemons in Nicaragua, just limes and tiny little Key limes known as “limones criollos.”

Though I remember my pastel de limón warmly, it had a few pitfalls. The crust could be soggy, the filling like unnaturally colored Jell-O pudding. If I remember correctly, the filling was more like pudding than curd—milk and cornstarch-based. The recipe I made is a Frankensteined mess of a pie crust I always use, a lime curd that borrows from the Bon Ap, recipe and a Cook’s Country lemon squares recipe. I loved it—you’ll love it. I liked it so much that I made for a dinner party and didn’t even offer my guests an extra piece to take home. Rude little pig. Tsk, tsk.

PASTEL DE LIMON

For the Crust (for an 8-inch diameter tart pan with removable bottom)
200 grams all-purpose flour (1 cup + 6 tablespoons)
3 tablespoons sugar
½ teaspoon salt
8 tablespoons cold unsalted butter, cut into small pieces
1 egg, lightly beaten
Ice water

– Combine the flour, sugar, and salt on a clean, dry work surface. With a bench scraper, cut in the butter in until it resembles wet sand. Alternatively, combine the flour and salt in the bowl of a food processor and add the butter. Pulse until the mixture resembles wet sand.

– Form a well in the center of the flour mixture and pour in the egg plus 1 tablespoon ice water. If using a food processor, add the egg and water and pulse just until the mixture comes together. If the mixture appears very dry and crumbly, add water, 1 teaspoon at a time, until the mixture is cohesive but not overly wet.

– Bring the dough together with your hands. Pinch off pieces of dough (about 2-inch pieces) and with heel of hand extend on surface. This method, called fraisage, ensures that the butter is evenly distributed in the dough. Shape the dough into a disc and wrap in plastic. Refrigerate for 30 minutes.

– On a lightly floured surface, roll the dough out to about 10 inches in diameter. Gently transfer the dough to the tart pan.  Press the dough into the pan, making sure to fill the ridges. Use kitchen shears or a paring knife to trim off any excess overhang and lightly dock all over with a fork.  Transfer the lined shell to refrigerator and chill 30 minutes, then, freeze for 20 minutes.  Preheat the oven to 375˚F.

– Line the frozen shell with foil or parchment paper (this is not wax paper!) and fill it completely with pie weights or dry beans. Bake until the dough looks opaque, 20 to 25 minutes. Transfer to a cooling rack.

– Reduce the oven temperature to 350˚F.

For the Curd
Pulsing the sugar and the zests adds an extra—well, zest! to the custard. I won’t judge you if you opt to ignore the step, though. Prepare the curd while the tart shell bakes. Save the egg whites for the meringue.

4 large eggs
3 large egg yolks
½ cup sugar
¼ teaspoon salt
1 tablespoon lime zest
1 tablespoon lemon zest
1/3 cup lime juice
¼ cup lemon juice
4 tablespoons unsalted butter
3 tablespoons heavy cream

-Process the sugar, lime and lemon zests in a food processor until zests are thoroughly broken down.

-Whisk the eggs, egg yolks, sugar, and salt together in a medium saucepan. Add the lime and lemon zests, lime and lemon juices and cook over medium-low heat, stirring constantly, until thickened and the consistency of pudding, 8 to 10 minutes. Strain the curd into a medium bowl. Add the butter and cream and stir until completely incorporated.

-Pour the filling into the blind-baked crust and bake about 15 minutes until set. Transfer tart to a cooling rack and cool to room temperature, about 1 hour. Transfer to refrigerator and chill completely, at least 2 hours.

For the Meringue
If using a stand mixer, use the whisk attachment.
4 large egg whites, at room temperature
¼ teaspoon salt
2/3 cup sugar
¼ cup powdered sugar
1 teaspoon vanilla extract

– Place the whites and salt in a clean, dry mixing bowl. Beat the whites on medium speed with an electric mixer until they loosen. Increase the speed to medium-high and whisk until soft peaks form, 2 to 3 minutes. Slowly add the sugar and powdered sugar and continue to whisk until stiff, glossy peaks form, 2 to 3 minutes more. Add the vanilla and whisk to incorporate.

-Top the chilled tart and bake at 450˚F until golden, 6 to 8 minutes. Serve.

Red Rum!

Rum-Cake-with-Buttered-Rum-Glaze

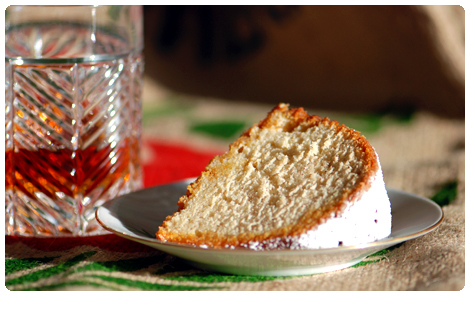
For a recent cooking class, my tutee wanted to make rum cake. I don’t have rum cake in my repertoire, and although there are several fortified Nicaraguan desserts and rum is like mother’s milk to the populace, I couldn’t find one in the infamous Nica Joy of Cooking, Doña Angélica. My mom suggested I use our household orange bundt as a base and replace some of the milk with rum. A sensible suggestion, but I Googled “rum cake” anyway. Boxed yellow cake + rum. Not quite the avenue I’d planned on taking.

But then, an actual recipe claiming to be some well-known rum company’s original TOP SECRET recipe…

I like secrets! And I also like that this recipe had 3 sticks of butter plus 1 cup of heavy cream.

I added a few spices to the recipe and, deciding that ¾ cup rum in the cake was stingy (mother’s milk, remember?), made a buttery-burnt sugar-orange-rum glaze. This cake is incredibly moist and stays that way for about a week.  Love it. Love it. Love it.

RUM CAKE with BUTTERED RUM GLAZE

I recommend a 7 or 12-year-old Flor de Caña (Nicaraguan rum) for this cake. If you can’t get Flor, substitute with dark rum of your liking. For an extra burst of orange flavor, process the sugar and orange zest in a food processor for about 1 minute.

Prepare the glaze while the cake is in the oven. It’s best to use a stainless steel saucepan for this recipe—a dark pan will make it difficult to determine the caramel’s color and progress. Avoid a shallow pan as there will be sputtering.

¡Atención! The base of this glaze is caramel, just like the one  on flan.  Please be careful when working with hot sugar—it’s like liquid napalm and you should never be tempted to stick your finger in the pot to have a taste. Unless you’re looking to erase the friction ridges on your fingertips.

For the Cake
3 cups all-purpose flour
2 teaspoons baking powder
½ teaspoon baking soda
½ teaspoon ground cinnamon
½ teaspoon ground ginger
¼ teaspoon ground allspice
¼ teaspoon salt
1 cup heavy cream
¾ cup dark rum
1½ cups (3 sticks) unsalted butter, softened
1½ cups sugar
1 tablespoon grated orange zest
1 teaspoon vanilla extract
3 large eggs plus 1 large egg yolk

– Position a rack in the middle of the oven and preheat it to 350˚F. Butter and flour (or spray with Pam for Baking) a Bundt pan.

– Sift together the flour, baking powder, baking soda, cinnamon, ginger, allspice, and salt; set aside. Combine the cream and rum in a liquid measuring cup; set aside.

– With an electric mixer (use the paddle attachment if using standing mixer) on medium speed, beat the butter, sugar, and zest until light and fluffy, about 3 minutes. Add the egg yolk and beat until fully incorporated. Add the whole eggs, one at a time, beating well after each addition. Add the vanilla and reduce speed to low. Add the flour mixture in 3 additions, alternating with the cream-rum mixture, stopping once or twice to scrape the sides and bottom of bowl with a rubber spatula. Mix until smooth, about 1 minute.

– Pour the batter into the prepared Bundt pan and bake until a toothpick inserted into the cake comes out clean, about 1 hour.

For the Buttered Rum Glaze
½ cup dark rum
½ cup orange juice (use the zested orange from the cake recipe)
1 cup sugar
¼ cup water
2 tablespoons unsalted butter
¼ teaspoon salt

– Combine the rum and orange juice in a liquid measuring cup; set aside.

– Place the sugar and water in a heavy bottomed, stainless steel, medium saucepan. Bring the mixture to a boil over medium-high heat and cook, gently swirling the saucepan from time to time, until the sugar turns deep amber and begins to smoke, 10 to 12 minutes.

– Immediately remove the saucepan from heat, and slowly and carefully pour in the rum-orange juice mixture. The mixture will sputter quite violently—don’t move the saucepan or stir the mixture. Once the sputtering has subsided, return the saucepan to medium heat, and with a heat-proof rubber spatula, stir until smooth, about 3 minutes. Stir in the butter and salt. Reserve ½ cup of the glaze.

– Once the cake is out of the oven, poke it all over with a metal or wooden skewer. Pour the remaining glaze over the cake and allow it to sit in the pan for 20 minutes before turning out onto a cooling rack.  Brush the cake with the reserved glaze and cool completely before serving.

Duck Hunt

Easter was a casual affair, with some simple but decadent food. A friend brought over a tin of duck confit (thank you very much!) which was promptly shredded and crisped and served alongside potatoes sautéed in a ladleful of duck fat, then topped it with runny-yolked fried eggs. It was salty, crisp, starchy happiness. The salad, the mesclun greens with grapefruit suprêmes, shaved endive, and paper-thin pear slices, lightened the meal a bit, but I still think all that richness gave me a touch of gout.

For dessert, I made waffles that were supposed to be crispy, but turned out to be tough. Insert blush of embarrassment: I hope my guest of honor didn’t crack any teeth! Some important rules to live by: don’t get a haircut prior to an important event, and don’t experiment with recipes when you’re entertaining. The pineapple compote-goat’s milk dulce de leche topping were fabulous though, so hopefully that makes up for the waffle failure. Similar to how some great shoes and glam accessories will spruce up your so-last-season frock…

Memory Lane

Someone asked me if I’d always “been into” food. I thought, “Not really…” and began reviewing my youthful ambitions: Ballerina. Disney Imagineer. Christian martyr.

Being a cook never crossed my mind. But then I went back and did some digging. If I had a bare wall and was allowed to decorate it only with the crispest snapshots of long-ago occurrences, food would be main point of focus. Some highlights in my food timeline:

Age 2: Buying powdered doughnuts at the drive-through convenience store in Miami.

Age 3: Sitting in the yard with my cousins, wearing a ratty t-shirt reserved for the stains from impossibly juicy mangos. Instead of mud pies, my grandmother and I made mud tamales.

Age 4: Tea time with my mother at 3:00pm, prompt: white toast with butter and guava jelly as the sun set in a blaze of orange. Tea time in Buenos Aires: white sliced bread, butter spread evenly to crust-less edges, cut into quarters.

Age 5: Realizing that not everyone had enough to eat. The supermarket in Granada was mostly dusty shelves. Encountering rice pilaf as an individual course in Mexico—and hating it.

Age 6: Experiencing fancy food: Guanábana bombe for a fancy dinner party, courtesy of my grandmother. Profiteroles bathed in warm chocolate sauce at a white tablecloth restaurant in Mexico City. Getting sick after eating marzipan grapes at a First Communion party. Discovering consommé.

Age 7: Eating birthday cake with Jell-o. Apparently a common occurrence at Mexican birthday parties. Feeling grown-up because I loved pistachio ice cream.

Age 8: Eating my first TV dinner—I just had to try that cherry cobbler.

Age 9: Reading the Anne of Green Gables and Little House on the Prairie series, mesmerized by the descriptions of food preparations. The Hobbit falls into this category as well.

Age 15: Reading Jeffrey Steingarten’s article about Roman pizza bianca, then devouring a 12-inch rectangle of said item at the forno in Campo dei Fiori. It was better than I’d dared to imagine.

Age 16: Discovering Roman peaches. I can still smell them.

Age 28: I don’t think I’d ever really enjoyed lobster until I had it cooked in briny ocean water in Cape Cod.

When I eat or cook it’s hard to stay in the present and not travel back in time. The smell, the taste, the touch—déjà vu and comfort.

Eye of the Storm

My favorite way to eat coffee cake: smear both sides of the slice with butter and whatever topping crumbs you can collect, then griddle over medium-low heat until golden.

My apartment is overrun with cooking equipment and groceries. They’ve busted out of the kitchen cabinets and counters and begun squatting on the floor, on my dining room table, on top of the bookshelves… Developing recipes from home means I have to purchase groceries several times a week, and in some instances, more than once a day due to last-minute changes, “Hmm. I suppose I could use spaghetti instead of rotini here.”

I’ve been cleaning up as I go—never, never, ever allow pots, pans, etc. pile up in your sink until you’re done because I can tell you, woodland creatures are very unreliable and won’t clean up after you like they do for Snow White—but my kitchen can’t contain the abundance of paraphernalia I need for my assignments.

The eye of the storm? My coffee table. If I need a moment away from The Pit of Despair I sit on the couch and bask in the order of that table. New magazines, books, flowers, and most importantly, cake. Cake sitting pretty under that glass dome is one of the few things that centers me and irons out the crease between my eyebrows…I should make cake more often. Don’t you just love cake?

Bowled Over

“Timid and shy and scared am I, of things beyond my ken,” sings Leisl in The Sound of Music.  I was painfully shy when I was little, and blushed every time I watched the rainy gazebo scene. I blushed even more furiously when I played Leisl to Ricky’s Rolf (Ricky had a crush on me and I despised him for it) at the end-of-the-year pageant in 1985. I was five years old.

Twenty-five years later, “timid” and “shy” are not words I would use to describe myself. I’d say Fräulein Maria lustily singing “I Have Confidence” provides a better illustration. Or maybe the scene where Captain Von Trapp finds Maria plunged into the deepest of curtseys in a ballroom of imagined guests.

Next weekend, my two-sizes-too-small kitchen will become a one-pupil-culinary school. I told my soon-to-be student to cook with confidence and above all, with an aim to pleasing herself. The Michelin inspector isn’t coming to dinner. Cook and eat what you like! And if things don’t turn out, so what? Clean up and give yourself a Do-Over (i.e. a reliable and satiating meal, like pizza with sausage and banana peppers).

Last weekend I was craving soy sauce and sticky rice, so I pulled this recipe together. I didn’t have a final product in mind, but this is what the craving turned into. Good things happen when you go with the flow.

MARINATED STEAK-&-VEGETABLE RICE BOWL
Serves 4 to 6
This would be really good with a fried egg on top. Sriracha can be found in the international or Asian foods aisle at most supermarkets—you’ll recognize it by its tomato-red color and rooster logo. Glutinous rice is short-grained and sticky, but if you can’t find it, use long-grain white rice, such as Carolina, or pick up a few containers at your neighborhood Chinese or Thai restaurant.

For the Rice
2 cups water
1½ cups glutinous or long-grain white rice
¼ teaspoon salt

For the Steak
1½ pounds flank steak
¼ cup soy sauce
2 tablespoons rice or white wine vinegar
2 tablespoons light or dark brown sugar
1 tablespoon toasted sesame oil
1 tablespoon grated fresh ginger
1 garlic clove, grated or minced
1 teaspoon Sriracha
4 teaspoons vegetable oil

For the Vegetables
1 medium cucumber, peeled, halved lengthwise, seeded, and cut into ¼-inch thick slices
1 tablespoon soy sauce
1 tablespoon rice or white wine vinegar
1 tablespoon toasted sesame oil
1 teaspoon light or dark brown sugar
4 cups shredded Napa or regular cabbage
2 medium carrots, grated
4 scallions, thinly sliced crosswise
1 cup cilantro leaves
8 ounces enoki mushrooms (optional)
½ cup dry-roasted peanuts, finely chopped or crushed

For the Spicy Mayo
½ cup mayonnaise
2 to 3 teaspoons Sriracha
2 teaspoons soy sauce
2 teaspoons lime juice
1 teaspoon toasted sesame oil
1 teaspoon light or dark brown sugar
½ teaspoon fish sauce (optional)

– Bring water to boil in a medium sauce pan. Add the rice and salt and boil until most of the liquid has evaporated and you can see small bubbles bursting on the surface of the rice. Immediately reduce the heat to the lowest setting, cover, and cook for 15 minutes. Fluff the rice with chopsticks or fork and serve.

– Cut the flank steak lengthwise into 3 long strips. Cut each strip in half crosswise to make 2- to 2.5-inch long steaks. Whisk the soy sauce, vinegar, sugar, sesame oil, ginger, garlic, and Sriracha together in a medium bowl.  Add the steaks, making sure they’re evenly submerged in the marinade. Cover the bowl with plastic wrap and refrigerate 30 minutes to 1 hour.

– Heat 2 teaspoons vegetable oil in a large nonstick skillet over medium-high heat until the oil begins to smoke. Add half of the steaks and cook until deep brown on both sides; 4 to 5 minutes per side. Transfer steaks to a plate and cover with foil. Repeat with the remaining 2 teaspoons vegetable oil and steaks.

– Whisk together the soy sauce, vinegar, sesame oil, and sugar in a small bowl. Add the cucumber slices and toss to coat.

– Whisk together the mayonnaise, Sriracha, soy sauce, lime juice, sesame oil, sugar, and fish sauce in a small bowl.

To assemble:  Place about ½ cup rice in a deep bowls or soup bowls. Slice the beef and divide evenly among plates. Arrange cucumbers, cabbage, carrots, scallions, cilantro, and mushrooms (if using) around rice and beef. Sprinkle with peanuts and serve with spicy mayo.

Taste of Home

Sometimes all you need is a home cooked meal, one that reminds you of mom making supper when you came home at the end of the school day. Nothing special or out of the ordinary, just something that says, “I’m home and the day is done.”  A Latin American friend and I were talking about how the fanciest meal at a restaurant couldn’t compare with a plate of simple food—and for us that meant anything that could be served with a heaping pile of rice and beans.

Carne chorizada is one of those unpretentious recipes that makes it into the dinner rotation at least twice a month at my house. It never gets boring, despite its brief and humble list of ingredients.

CARNE CHORIZADA
Serves 4 to 6
This recipe can also be made with meatloaf mix or a combination of ground beef and ground pork. If you can’t find fresh baby corn, substitute with 1½ frozen corn kernels. Achiote paste is a common ingredient in Nicaraguan dishes and can be found in Latin American supermarkets or the international aisle of the supermarket. It’s primarily a colorant, so if you can’t find it, don’t worry and proceed with the recipe.

2 pounds 85{7e75139007ced55322cd19a88b90f170970c9802fa5abc2ce00631fcd14484e3} lean ground beef
Salt and pepper
2 teaspoons Worcestershire sauce
1 teaspoon yellow mustard
1 tablespoon vegetable or corn oil
1 onion, finely chopped
3 small red potatoes, peeled and cut into ¼” dice (about 1½ cups)
2 medium carrots, peeled and cut into ¼” dice (about 1 cup)
8 ears baby corn, cut into crosswise into ¼” rounds
1 tablespoon achiote paste (optional)
3 tablespoons cider vinegar

– Using your hands, combine the beef with 1 teaspoon salt, ½ teaspoon pepper, Worcestershire sauce, and mustard in a large bowl.

– Heat the oil in a large skillet over medium heat until shimmering. Add the onion and cook until it’s softened and translucent, about 5 minutes.  Add the achiote paste (if using) and cook, stirring with a wooden cooking spoon, until the onions are evenly coated, about 1 minute.

– Increase heat to medium-high; add the beef, and cook, continuously stirring and breaking up any lumps, until the beef is no longer pink and most of the released juices have been absorbed. Stir in the vinegar, potatoes, carrots, and baby corn. Cover, reduce heat to low, and simmer until the vegetables are tender, about 15 minutes.  Remove skillet from heat, season to taste with salt and pepper and serve with white rice, black or red kidney beans, corn tortillas, and/or fried plantains.

Where the Heart Is

Though the Aeropuerto Internacional Augusto César Sandino has boasted jet bridges for several years now, I still expect to descend directly from the airplane onto the tarmac. In the 80s, excited family and friends would crowd together mosh pit-style on a terrace that overlooked the landing strip, everyone calling out and waving signs like crazed fans awaiting a celebrity’s arrival on the red carpet. But they were just waiting for their exiled own, coming home for the holidays.

My trips to Nicaragua are bittersweet, especially during Christmas. My passport still marks me a citizen, and I do call it “home” whenever I refer to it, but Nicaragua hasn’t really been home for a very long time. I’ve moved on, but that first sighting of dusty olive green land from the scratched acrylic windows makes my heart cramp. Memories of trips when my family lived in the U.S. and Mexico during the 80s jumble with those from college breaks and the more recent perfunctory visits. The childhood jaunts were all fun and adventure; I was mesmerized by ox-pulled carts on the main roads and street vendors pouring sodas into plastic bags—mini-udders that dispensed Coca-Cola. But even in the haze of little-kid wonderment, I knew everything was broken, and it made me deeply sad. It’s sadder today. But, there are uniquely beautiful and wow-worthy people and scenes to be found, and I appreciate them all the more.

I Pita the Fool!

I was flipping channels once upon a Saturday morning and landed on a “Baking with Julia” marathon. A gentleman with a Lloyd Christmas-meets-medieval pageboy haircut was making pita bread, and I thought, why not? I’ve never made pita bread.

PITA BREAD
Adapted from an episode of “Baking with Julia” with guests Jeffrey Alford and Naomi Duguid.
Bread baking is time consuming, so clear your calendar before you start.

2 ½ cups warm (about 110˚F) water
1 teaspoon dry yeast
2 ½ cups whole wheat flour
1 tablespoon kosher salt
1 tablespoon olive oil, plus additional for greasing bowl
About 6 cups unbleached all-purpose flour

– Preheat oven to 200˚F. As soon as it reaches temperature, shut the oven off. Dough likes to rise in warm places, and this guarantees a cozy resting place.

– Place warm water in large bowl. Sprinkle yeast over water and wait for it to dissolve, about 1 minute. Stir in the whole-wheat flour with a wooden spoon. “Stir 100 times in the same direction,” Alford recommended—this will prevent the gluten strands that begin to form from breaking.

– Cover bowl with plastic wrap and let rest in oven, 30 minutes and up to 8 hours.

– Remove bowl from oven and remove plastic. Stir in salt and oil. One cup at a time, start stirring in the all-purpose flour. The dough will absorb different amounts of flour, depending on the day (dough is affected by numerous factors, including humidity – I added about 2 ½ cups flour when I made it). The dough will be sticky and shaggy, but will have some body (see photo 1).

– Turn the dough out onto a clean, dry, and well-floured surface. If you’ve never kneaded dough, here are some pointers: With the heel of your hand, push the dough away from you, firmly, as if you were scrubbing clothes the old-fashioned way, on a wooden plank. Fold the far end of the dough towards you, then turn it counter-clockwise, and repeat action.

– Now you’re ready: Begin kneading, adding more flour as necessary, until the dough has “a certain tension,” about 10 minutes (see photo 2). Normally, I would say the finished dough will have a smooth, satiny texture, but the whole wheat flour makes this dough a bit more like coarse leather. It will be tight, like a firm muscle.

– Place dough in a large, well oiled bowl. Lightly coat the dough with oil. Cover the bowl with plastic and place oven. Allow the dough to rise 2 to 3 hours, until it is doubled in size. An old tip: when the dough is ready, you can poke the dough and your finger’s indentation will remain.

– Preheat oven to 400˚F. If you have a pizza stone, set it on the bottom third the oven. Otherwise, place an inverted rimmed baking sheet in the oven.

– Transfer the dough to a lightly floured surface. With a bench scraper, cut the dough in half. Cut each half into 8 pieces (see photos 3 and 4).

– Roll each piece into a ball. Flatten each ball to about 4 inches in diameter. Then, with a rolling pin, roll it out to about 7 inches in diameter (see photos 5 through 8).

– Carefully transfer 4 to 6 rounds to the pizza stone or baking sheet. The pitas will puff after about 3 minutes. Allow 30 seconds more and remove from oven. Stack pitas together and wrap in a towel to keep warm.

– If you don’t want to use all the dough, save half and refrigerate. Use the next day. Alternatively, use it all, cool the pitas, and store them in plastic Ziploc bags in the freezer. Pop in the toaster or oven when you’re ready to eat them.

Smut

Huitlacoche or (equally tricky to pronounce) cuitlacoche is a black, bulbous fungus that grows on corn. It looks revolting and distantly related to The Blob, so I can only assume that some poor Aztec thousands of years ago must have been either starving or being subjected to punishment when he first tried it. Famished daredevil or criminal, whoever was the first to eat it made a wonderful discovery. Sometimes referred to as smut, huitlacoche has also picked up a swankier moniker: corn truffle. Smut or truffle, huitlacoche is earthy, velvety, and intensely rich. In Mexico it’s sold canned at the grocery store (often with chiles and onions), but lucky for you, you don’t have to book a ticket to the D.F. to get it — simply order a few tins on Amazon with your next book or DVD purchase. It’s surprising, unexpected, and luxe layered in a quesadilla, stuffed into fried squash blossoms, wrapped inside crêpes, or tossed with pasta.

LINGUINE with HUITLACOCHE-MUSHROOM SAUCE
Serves 2

8 ounces linguine or spaghetti
1 tablespoon olive oil
1 onion, finely chopped
Salt and pepper
1 (10-ounce) box cremini or button mushrooms, cleaned and thinly sliced
4 garlic cloves, minced
1 (215 gram / 7.5 ounce) can huitlacoche, chopped
½ cup heavy cream
¼ cup grated Parmesan or Asiago cheese
4 scallions, thinly sliced

– Bring 4 quarts water to boil in a large pot.

– Heat olive oil in a large skillet over medium-high heat until shimmering. Add onion and ½ teaspoon pepper and cook until onion begins to soften, about 3 minutes.  Add mushrooms and sauté until golden brown, 6 to 8 minutes. Stir in garlic and cook until fragrant, about 1 minute,

– Stir in the huitlacoche and cream and simmer over medium heat until slightly thickened, about 5 minutes. Stir in cheese and season with salt and pepper.

– Add 1 tablespoon salt and pasta to boiling water and cook until al dente. Reserve ¼ cup pasta cooking water, drain pasta, and add to huitlacoche sauce in skillet. Toss to coat, adding reserved pasta water 1 tablespoon at a time if necessary. Serve in bowls and top with sliced scallions.