Author: MariaDelMar Sacasa

CHOPPING BROCCOLI

1broccolirawI was out of town the week before last and came home to a near-empty fridge and a series of dinners that I can’t even recall right now, they were so unmemorable. I think there was a lot of cereal. And plain spaghetti.

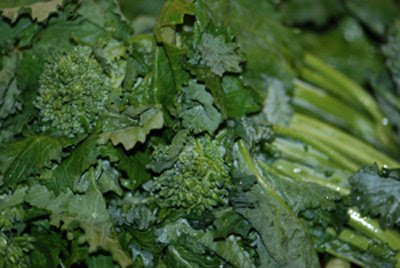
This dinner lethargy spilled over into the weekend and again, I stared into a vacant ice box. There were some flour tortillas, a tiny tub of mango and red onion salsa (which I have yet to throw away), a container with leftover red bell pepper tops and bottoms, a depleted box of Maison du Chocolat assorted chocolates, vermouth, and a bag of carrots which are starting to sprout monster roots. Not my finest moment. I did, however, have a drawerful of beautiful broccoli rabe which I was determined to eat my way through this weekend. And I did. All 3.5 pounds of it. If you’re wondering how I didn’t get sick of it, see below for the various interpretations of that brash, biting green (which is a relative of the turnip, and not broccoli, if you were wondering):

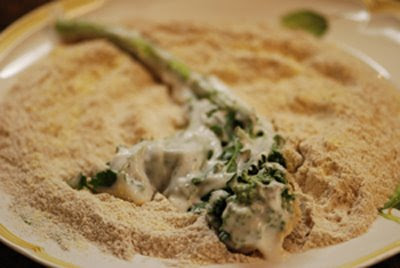
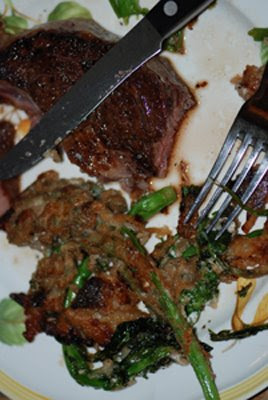
SATURDAY: Broccoli rabe “fritto” – inspired by the Zuni Café Cookbook

1 bunch broccoli rabe
2 cups flour (unbleached all-purpose or whole wheat)
1 cup cornmeal
2 cups plain yogurt
vegetable oil
salt & pepper

-In one shallow dish, spread out the flour and cornmeal and combine well. Pour the yogurt into another shallow dish and season generously with salt and pepper.
-Heat about two inches of vegetable oil in a frying pan over medium-high heat.
-Meanwhile, one at a time, dunk each stalk of broccoli rabe into the yogurt then coat with the flour mix. Lay the coated broccoli on a baking rack.
2coatedOnce all the broccoli rabe is coated, fry until golden in the hot oil. Make sure the broccoli bubbles somewhat violently when you place it in the oil: if you try in cool oil you’ll have a wilted, soggy mess. Also, don’t overcrowd the pan.
Transfer the fried broccoli rabe to a paper towel-lined plate and sprinkle with salt.
Serve.

3fried
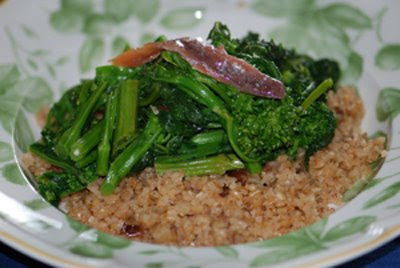
SUNDAY: Broccoli rabe with toasted bulgur wheat and dates

1 cup bulgur wheat
2 cups water
olive oil
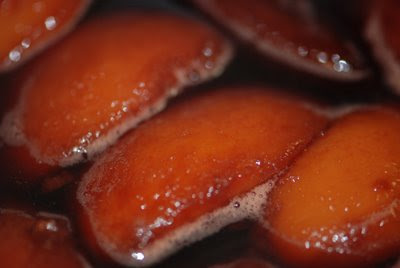
1/3 cup dried dates, chopped
1 bunch broccoli rabe
2 garlic cloves
½ teaspoon red pepper flakes
salt & pepper
anchovy fillets (optional)

-Set water to boil in a large pot.
-Separately, in a small saucepan, start the wheat. Heat about 1 tablespoon olive oil over medium-high heat. Add the bulgur wheat and cook, stirring, until deep golden and toasty. Add dates, 1 teaspoon salt, a few generous grindings of pepper, and water. Boil until the wheat’s surface is visible, reduce the heat to low, cover, and cook until all water is absorbed, about 15 minutes. Set aside.
-Cook broccoli rabe in boiling water with 1 tablespoon salt until tender, 2 to 3 minutes. Drain, run under cold water until cool enough to handle, drain again, and transfer to a cutting board. Coarsely chop broccoli rabe.
-Heat 2 tablespoons oil in a large skillet over high heat. Add garlic and red pepper flakes and cook, stirring, 1 to 2 minutes. Add broccoli rabe and sauté until heated through, about 3 minutes. Season with salt and pepper.
-Serve broccoli rabe atop bulgur wheat. Top wih anchovy fillet.

4withdates
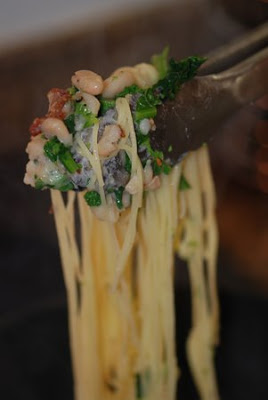
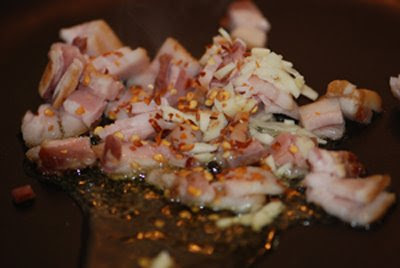
MONDAY: Broccoli rabe, bacon, and cannellini bean pasta
5bacon

2 strips good bacon
½ teaspoon red pepper flakes
olive oil
2 garlic cloves, finely sliced
1 15-oz. can cannellini beans, drained
1 bunch about 12 oz. broccoli rabe
8 oz. angel hair / cappellini pasta

-Set water plus 1 tablespoon salt to boil in a large pot.
-Heat 1 tablespoon oil in large skillet over medium heat. Add bacon, garlic, and red pepper flakes and cook, stirring, until bacon is cooked through. If bacon begins to burn, lower the heat.
-Cook broccoli rabe in boiling water until tender, 2 to 3 minutes. Do not drain water: transfer broccoli rabe with tongs to colander set over large bowl. Run broccoli rabe under cold water until cool enough to handle, drain again, and transfer to a cutting board. Coarsely chop broccoli rabe.
-Add cannellini beans to bacon skillet and cook 2 to 3 minutes. Add the broccoli rabe and cook until heated through, about 3 minutes. Season with salt and pepper.
-Add pasta to boiling water and cook until al dente. Reserve ¼ cup of cooking water, then drain pasta and return to pot. Add 2 tablespoons olive oil, reserved water, and broccoli rabe mixture. Toss to coat and serve with grated parmesan.

DSC_0111


BACK IN THE SADDLE AGAIN

openerI wish I could say I’d been off summering somewhere fabulous and glitzy, but the reason behind my long absence is much more plebeian and pedestrian: I started working and have been acclimating to my new situation. That being done, I am now back and ready to start feeding the blog – it’s looking a bit gaunt at the moment.

To ease into things, a simple recipe of French toast – quick and comforting for those Sunday mornings when the promise of Monday starts looming ominously in the distance:

For 4 (or 2 with roomy stomachs)

1 C. milk
3 whole eggs
½ C. plus 1 TBSP. granulated sugar
¼ tsp. salt
1 tsp. vanilla extract
3 TBSP. butter
8 tsp. cinnamon
8 slices hearty bread
¼ C. toasted pecans or walnuts, toasted
2 bananas, sliced into ¼”-thick rounds

-In a pie plate or shallow bowl, whisk together milk, eggs, 1 TBSP. sugar, salt, and vanilla.

-Heat a large nonstick skillet over medium-high heat and add 1 ½ TBSP. butter. When the butter begins to foam, sprinkle the skillet with 2 TBSP. sugar and 1 tsp. cinnamon.

sugarpan-One at a time (or two, if they fit) dip 4 bread slices in the egg mixture, turning to coat (don’t let the bread just sit there unless you want mush for breakfast). Arrange the dipped slices on the sugared’n’cinnamoned skillet and cook till nicely browned, 2 to 3 minutes.

placebreadonskillet-While that first side is cooking, sprinkle the soggy side facing you with 2 TBSP. sugar and 2 tsp. cinnamon. Flip bread and cook opposite side. You should have a lovely crunchy crust on your toast.
Repeat dipping, buttering, sugaring’n’cinnamoning, and cooking with remaining bread slices.

-Arrange French toast on plates and top with pecans and sliced banana. Sprinkle with powdered sugar and serve with maple syrup, if desired.

finishedproductNOTES: Under no circumstances should you use flimsy sliced white bread for French toast. It’ll soak up all the liquid and be a hopeless wet mop of a thing. Stick to heartier stuff like challah or those so-called Italian loaves… I like a croissant now and then (but then I top it with whipped cream and berries), but only if it’s a sub-par one – no sense in using a perfect specimen for this.

ADIOS, COLONEL

120470303_2bb3365c08_o

Kentucky Fried Chicken is a thing of the past to me. I don’t have beef with that fast food chain in particular – although that rat infestation at a downtown New York City branch a summer or two ago was pretty bad – but for one reason or other, that red-and-white bucket hasn’t graced my dinner table in many a moon. However, the memory of the Colonel’s secret 11-herbs-and-spices recipe is forever embedded in my brain and taste buds.

I’ve eaten fried chicken several times at my paternal grandmother’s house – pollo a la canasta (basket-style chicken – perhaps alluding to a picnic basket?) in local parlance – and it appeared every now and then at home. Also, there’s a chicken chain in Nicaragua called Tip-Top that built its fame on fried chicken, and once in a while on Sundays we’d have lunch there on our way to my grandparents’ house in Granada. All were good and had that homemade touch, but that was just the problem, they were very obviously homemade and lacking that extra-crispy skin. I wanted the Colonel’s secret.

None of my kitchens have ever witnessed fried chicken. I was always afraid of the stink all the frying would produce, I had concerns about flabby skin and undercooked chicken, I didn’t have a recipe I trusted, etc. etc. Fried chicken was just not an option. The closest I ever got was buying Tyson’s breaded chicken fingers. And I baked those.

Last week, though, as people at work geared up for the long 4th of July weekend, I got a hankering for fried chicken. I don’t have a grill, so barbecue was out, and fried chicken seemed to be a very all-American, very apropos thing to make. I was so caught up in the idea that I didn’t even consider my previous fears and hesitations. And, as luck and fate would have it, I came across a special issue of Cook’s Illustrated titled “American Classics.” There on the cover, was the most beautiful, textured, mahogany-colored plate of fried chicken I’ve ever seen. There was no stopping me now; I would become the Colonel.

Preparation is a bit intense, but, so worth it. I made one bird and ate most of it – with the help of the husband – in two sittings. We miraculously had a leftover breast which we ate out of the fridge the next day and though not warm and as crunchy, it remained incredibly finger lickin’ good. Make it for a crowd – spread the love.

FRIED CHICKEN
Adapted from Cook’s Illustrated
close-upofchicken

As I mentioned above, the prep time is a bit lengthy, but cooking goes by in a flash – and it’s not smelly, believe it or not. Make sure you have at least one grid rack, and instant read thermometer.

½ cup plus 2 tablespoons table salt
¼ cup sugar
2 tablespoons paprika
3 medium garlic heads, cloves separated
3 bay leaves
2 quarts low-fat buttermilk
1 whole chicken (about 3 ½ pounds), giblets discarded, cut into 12 pieces (each breast cut in half crosswise, thighs and drumsticks separated, wings cut into two pieces)
4 cups unbleached all-purpose flour
1 large egg
1 teaspoon baking powder
½ teaspoon baking soda
3 – 4 cups refined peanut oil or vegetable shortening

fryingchicken

-In large zipper-lock bag, combine salt, sugar, paprika, garlic cloves, and bay leaves. With rubber mallet or flat meat pounder, smash garlic into salt and spice mixture thoroughly. Pour mixture into large plastic container or nonreactive stockpot. Add 7 cups buttermilk and stir until salt and sugar are completely dissolved. Immerse chicken and refrigerate 2 to 3 hours.

-Remove chicken from buttermilk brine and shake off excess, discarding any garlic and bay leaf bits. Place chicken pieces in single layer on a large wire rack set over a rimmed baking sheet. Refrigerate, uncovered, for 2 hours. (You can refrigerate in for an additional 6 hours – just make sure you cover chicken with plastic wrap).

-Measure flour into large shallow dish. Beat egg, baking powder, and baking soda in medium bowl; stir in remaining 1 cup buttermilk (mixture will bubble and foam). Working in batches of 3, drop chicken pieces in flour and shake dish to evenly coat. Shake excess flour from each piece, then, using tongs, dip chicken pieces into egg mixture, turning to coat well and allowing excess to drip off. Coat chicken pieces with flour again, shake off excess, and return to wire rack.

-Line large plate with double layer paper towels. Heat oil (oil should be 2 ½ inches deep in pan) to 375˚F over medium-high heat in large 8-quart cast-iron Dutch oven with a diameter of about 12 inches. (I made mine in a 4-quart capacity and had no trouble – just make sure you can safely add the oil and chicken without causing an overflow).
Place half the chicken pieces skin-side down in oil, cover, reduce heat to medium, and fry until deep golden brown, 6 to 8 minutes. After about 3 minutes, uncover the pan, lift the chicken pieces with tongs to check for even browning; rearrange the pieces if some are cooking faster than others. Check the oil’s temperature – at this point it should be at about 325˚F.

-Once the first side is deep golden brown, turn the pieces and cook the opposite side 6 to 8 minutes, uncovered. Transfer to paper towel-lined plate, allow to drain, then transfer to wire rack.

-Meanwhile, bring the oil back up to 375˚F and cook the remaining chicken in the same manner.

-Devour.

platedchicken

OPEN WIDE

theirburger

A Counter burger.

In anticipation of our May trip to Los Angeles, the husband and I spent countless hours researching the food scene of that city. As it was a family trip, we knew we’d have a jam-packed schedule, and thus much time was spent by Señor O in mapping out eateries and reviewing menus and online comments. At last, our selections were meticulously organized into an Excel spreadsheet and off we went. Don’t laugh – this document was as precious to us as maps of the stars’ homes are to Hollywood tourists.

Among the places we chose to visit was The Counter, a burger joint that claims to offer 312,120+ different, DIY, burger combinations said to be “as unique as each customer.” I don’t know who crunched the numbers necessary to come up with that figure nor how exact it is, but I can confirm that the number of choices offered on their check-this-box-if-you-want-this-on-your-burger menu is dizzying:

OK, I think you get the gist of it. The only things really missing from this vast menu are whipped cream and maraschino cherries – I think those are reserved for their equally exorbitant shakes.

It took me a while to settle on a 1/3-pounder beef burger with Gruyère, grilled pineapple, bacon, and I forget what else. I really wanted a fried egg but thought that with the grilled pineapple and other etc.’s would be a bit much. Imagine then my surprise when I opened up Gourmet’s July issue to discover the Aussie Burger, a Down Under burger that could hardly be contained between two buns. The ingredients in this Oz-worthy sandwich: beef patty, fried eggs, grilled pineapple, pickled beets, grilled onions (optional), and chile mayo. One glance at this whopper’s gorgeous photo was all I needed to declare it Burger Night – plus, I’d baked rolls the day before and the leftovers would be put to very good use.

Behold, my Open-Wide-and-Say-Ahhh-Burgers:
DSC_0071
opener

CORN OFF THE COB

1corn

Sinking your teeth into the sweet, tender crunchiness of a fresh ear of corn is one of summer’s indubitable pleasures, the butter-slathered kernels yielding to your eager bite, the salt crusting your upper lip. For many of us, that first bite acts as a time machine, transporting us to the county fair or the Sunday afternoon backyard barbecue of our youth. My corny time machine takes me to Reino Aventura, a Six Flags-like amusement park in Mexico City where I had a Corn on the Cob, The Extreme Version: grilled corn generously schmeared with mayonnaise, sprinkled with grated cheese and chile piquín, and finished off with a squirt of lime.

But, regardless of whether it’s consumed in English or en español, nibblers will agree that eating corn on the cob has some unattractive side effects; bits and pieces of kernel stubbornly fix themselves in our gums, between our canines, incisors, and molars, making our faces contort and twitch as we not-so-discreetly attempt to dislodge them with the tips of our tongues. Even in the comfort and privacy of my own home, I can’t stand the struggle.

So, the other day when I was craving Mexican street corn, I decided I’d deconstruct the local treat and serve it forth in a bowl. It would be a much more Emily Post-ish eating experience, besides which I would be able to get larger mouthfuls (not so Emily Post, in the end).

Though versions abound, this is my recipe for Mexican Corn Off the Cob. Serve it as a side dish to grilled steak, fajitas, or as a topping for quesadillas.

MEXICAN CORN OFF THE COB
Serves 2 to 3

6 ears of corn, husks and silk removed (yields approx. 3 cups of kernels)
2 tsps. corn oil
2 to 3 TBSP. mayonnaise
Juice of one lime
chile piquín or chile de árbol flakes, to taste
1/3 C. grated cotija cheese

-With a small, sharp paring knife, scrape the kernels off the cob. Work in a large shallow bowl so you can catch the kernels as well as any milk that may leak out.

-Heat oil in a large skillet over high heat until shimmering. Add kernels and toss to coat in oil. Either stir or shake kernels constantly until they are nicely toasted – I prefer mine a bit charred.

-Pour corn into a serving bowl and season with salt and pepper. Stir in mayonnaise, then sprinkle with chile and cheese. Drizzle with lemon juice and serve.

4decob“De-cobbing.”

BRAN-Y AND BEAUTIFUL

1opener

If you played a word association game and the term “bran” was thrown at you, chances are you’d blurt out responses like, “constipation!” “old people!” “laxatives!” Whenever I’m in the cereal aisle and I see that box with the big, bold All-Bran logo, cheap and very literal toilet humor comes to mind. Note to Kellogg’s: making John McEnroe the star of your 10-Day Challenge commercials isn’t going to increase cereal sales. If you were to wake up to find John McEnroe perched at your bedside, wouldn’t you just go right then and there, thereby negating the need to have a bowl of Kellogg’s All-Bran?

Let’s turn our attention now to bran in its baked incarnation: the bran muffin. It’s the ugly duckling of the breakfast breads with its dung brown color and lack of accessories in the form of streusel topping and/or chocolate chips. If you’re a late morning arrival at the office cafeteria, it’s usually only crumbs and bran muffins that remain.

But despite the fault-finding I’ve been doing, I do like bran cereal and muffins. I do! Sliced bananas and a handful of blueberries make those dry doodles agreeable, and a great bran muffin is nutty, tasty, and won’t sit like an undigested rock in your stomach. I hadn’t baked any in years, and was happily surprised with the results I got from this recipe. These muffins are moist and light and can be eaten plain, spread with butter and good preserves, or my favorite, split in half and grilled a day later. P.S. to Kellogg’s: These are a far better advertisement than Mr. McEnroe.

EVERYDAY MAPLE-BRAN MUFFINS WITH BLUEBERRIES
Adapted from “The Art of Quick Breads” by Beth Hensperger
Yields about 1 dozen standard muffins.
3optional

1 ½ C. cultured buttermilk or plain low-fat yogurt
2 eggs
¼ C. (½ stick) unsalted butter, melted
¼ C. vegetable oil
¼ C. pure maple syrup
1 ½ C. All-Bran cereal
1 ½ C. fresh or unthawed blueberries
1 C. unbleached all-purpose flour
½ C. wheat or oat bran flakes
¼ C. light brown sugar
1 tsp. baking powder
1 tsp. baking soda
¼ tsp. salt

-Preheat the oven to 400˚F with rack in the center.

-Grease a standard 12-cup muffin tin.

-In a large bowl, whisk together: yogurt or buttermilk + eggs + melted butter + oil + maple syrup + All Bran.
Stir in the blueberries and allow to stand at room temperature 5 – 10 minutes.

-In a different bowl, combine the remaining (dry) ingredients.

-Once the All Bran mix has rested, add the dry ingredients mix and stir briskly with a large spatula or spoon till evenly moistened, using no more than 15 strokes.

-Spoon the batter into each muffin cup, filling till nearly level with the top of the pan.

-Bake 20 – 25 minutes until browned and a cake tester comes out clean.

-Allow muffins to rest in tin about 5 minutes before turning out on rack to cool. Serve warm.

-To freeze leftovers: Cool completely and wrap muffins individually in wax paper and store in plastic baggies.

-To serve frozen muffins: Warm in a 350˚F oven, microwave 20 – 30 seconds, or split in half horizontally, butter both sides of each half and grill over medium heat till golden and hot.
2leftoversGrilled muffins served with fruit salad and honey-laced yogurt.

I’VE GOT THE BLUES

DSC_0043

Summer in all its fury has arrived and though I hail from tropical climes I have no tolerance for high temperatures. Try as I might to ignore it, I feel the moist heat insidiously making its way into my skin through every tiny pore, till I am overcome by it, enshrouded as if by giant moth wings. Usually, when people are gadding about frolicking in the sun, I prefer to draw the blinds and hide in the cool comfort of air-conditioning.

Summer does have its positive points of course, one of them being ice cream. Though perfectly acceptable during cooler seasons, ice cream is a treat best enjoyed when the mercury rises tall. This past weekend O and I walked down the street to J.P. Licks for a scoop and were met with a long line of eager customers. A mound of cappuccino crunch was just what we needed to bring the temperature down.

This horrid 95˚F-plus weather has been here for a few days now, and just as foodstuffs are dried, salted, pickled, and canned for the barren winter months, so must the fridge be stocked with cold, refreshing foods like crisp greens, bright fruit punches, and obviously, ice cream in anticipation of days hot and humid.

Rather than setting out daily under the unrelenting blaze of the sun for a cup or a cone, it is better to have a pint – or a quart – of something iced and creamy in the freezer. I’d come across this recipe for Blueberry Sour Cream Ice Cream in Dorie Greenspan’s “Baking” tome a few months ago, but was waiting for the appropriate weather forecast and ripe berries to come along, and finally, they did – hand-in-hand, too.

BLUEBERRY SOUR CREAM ICE CREAM
Adapted from “Baking: From My Home to Yours” Dorie Greenspan
Yields approx. 1 pint

Special equipment: ice cream maker & container in which to store the finished product – unless you plan on eating it all in one sitting, straight out of the bowl.

1 C. blueberries (you are free to use thawed and drained frozen berries)
1/3 C. sugar
Pinch of salt
Grated zest and juice of ¼ lemon
¾ C. heavy cream
¾ C. sour cream

-Put blueberries + sugar + salt + zest + juice in a medium, non-reactive saucepan and cook over medium heat, stirring, till mix boils and berries pop, about 3 minutes.

-Purée the mix in a blender till fairy homogenous, about 1 minute.

-Add heavy and sour creams and pulse just to blend.

-Taste and adjust flavor by squirting in a bit more juice, adding a pinch more salt, and/or a teaspoon of sugar.

-Refrigerate mix till completely cooled and process according to your ice cream maker’s instructions.

opener

SWINED AND DINED

1Aopener

Ever since my return from LA I’ve been thinking on the bacon-wrapped hot dog. As that ultimate of downtown delicacies doesn’t exist in my current place of residence, I would have no choice but to recreate it in the confines of my kitchen. Last week, as the object of my consideration became an obsession, it became a tentative item on the week’s dinner menu. Though I was eager to undertake Mission Bacon Dog, there were details that needed to be sorted out, for instance: What variety of frank would be the best? How thick did the bacon it would be draped in be? Also, what garnishes should top it? In LA it was a veritable Mexican parranda, with guacamole, grilled jalapeños, and sautéed onions and peppers, but did I want a different, more personalized theme?

I started researching garnishes and was in the midst of studying homemade pickling, when suddenly, at 6:00pm on Wednesday last week, my ruminations came to a jaw-grinding halt: I discovered there was no Spanish chorizo to be had at Whole Foods. Spanish chorizo was the key ingredient in the recipe I’d intended for dinner, and without it, I had nothing.

Plan B-less, I looked around in a panic. It was getting late, the after-work crowd had descended, Señor O was growing irritable, and though I kept pressing myself into the corner of a cereal display, shoppers trying to squeeze past were giving me the stink eye. I kept staring at the bins of salami, willing them to transform into the chorizo I needed, but salami they obstinately remained.

I’d had ample opportunity to view the stacks of hot dog packs while on my desperate search for chorizo, and knew all I had to do was reach out and grab one, but truth to tell, I didn’t want that particular Wednesday to be Mission Bacon Dog night because all the variables weren’t in place, but I was between a rock and a hard place – i.e. Señor O’s glare – so I caved in and bought a package of all-natural Wellshire Frank beef hot dogs, a few slices of Whole Foods bacon, and a bag of buns.

Now, another of the questions I’d been pondering was how to keep the bacon in place while the wiener cooked. There were no sticks or strings on the LA one, and I was determined not to cheat. I was concerned, however, because the bacon was a little too thick and a bit raggedy to boot. Also, I’d had to use one-and-a-half slices per sausage because one wasn’t enough to spiral around the whole thing.

I assumed/hoped that the tacky quality of the meats would be enough to adhere them to each other, and to my surprise, the bacon held even after I gently laid two blanketed dogs in the skillet. A mound of onions that I’d set to cook earlier was melting into a caramelized pile while the bacon dogs sizzled and released a deliciously porky aroma.
1Everything in its place.

The Mission was going smoothly until I tried to turn the hot dogs; the bacon started to peel off. With the help of tongs and a spatula, I did the best I could to keep the hot dogs clothed, but it they were beyond help. We were starving by this time and the smell of frying bacon and onions was overpowering.

3
Take it off!

I finished stripping the hot dogs and waited for the whole mess to brown, then I stuffed a hefty helping of the dripping mess into a warm bun and settled down to a dinner that would make those LA vendors proud.
4


DON’T TRY THIS AT HOME

Garrobo

Today’s New York Times Dining & Wine section has a great article by Kim Severson titled Recipe Deal Breakers: When Step 2 is ‘Corral Pig’. She discusses the frustrations suffered by even the most adventurous and experienced cooks when they run into recipes with phrases such as “if you don’t have a helper,” or ingredients lists with impossible to obtain items like “wild boar from the hills surrounding Santa Fe.”

Usually, when a recipe seems convoluted and complicated, I simply plan ahead. I shop early, scouring shops all around town and ordering items online if necessary, and then I block out a day to spend uninterrupted in the kitchen. However, even my gung-ho-edness has its limits. While I have yet to encounter a recipe that requires me to corral a pig, I return time and again to my basic book of Nicaraguan cookery: 50 años en la cocina con doña Angélica, to read, for sheer entertainment’s sake, the recipe printed on page 58 of the 9th edition (published 2006): iguana en pinol. This plato típico (traditional dish) calls for one whole iguana, peeled. Just like that. Some recipes are indeed better left alone.

For your reading enjoyment, I have translated the recipe.

IGUANA EN PINOL

“This is a traditional Nicaraguan dish, product of the time-honored culinary creativity of Granada. As the iguana is a cold-blooded animal, the consumption of its meat is permitted on Wednesdays and/or Fridays during Lent, traditionally regarded as days of observance; besides, that season coincides with the oviparous reproductive period of that esteemed reptile, whose soft-shelled eggs are mostly yolk-filled, are considered by those in the know as true ‘DELICATESSEN.’
Sensible were the first naturalists that classified it in giving the name “IGUANA DELICATISSIMA.”

2 C. corn
1 whole iguana, peeled
2 sour oranges
8 C. water, with salt
1 head of garlic, pounded
1 onion, sliced
1 tsp. whole peppercorns
3 large onions, chopped fine
2 C. lard
1 tsp. ground black pepper
sour orange juice
6 small onions, sliced thin
¼ C. lard

-A day ahead, lightly toast the corn, without letting it brown; mill it in the machine, leaving a bit coarse and store it.

-Early the following day, buy the iguana at the market with its corresponding ration of eggs; wash it well with the sour orange juice, cut it into small pieces and boil it in the salted water, along with the garlic cloves, the onion, and the peppercorns, until it’s soft; remove it from the fire, and strain it. Reserve the liquid.

-Measure out 4 C. of the corn you toasted and milled; add the reserved broth, and return it to the heat, stirring constantly until thick and well cooked. In a casserole that can be presented at the table, fry the (3) onions in the (2 C.) lard over moderate heat, until the are lightly golden; add the cooked corn, the ground pepper, and sour orange juice to taste; cook everything over low heat, taking care that it doesn’t dry out.
-Add the iguana and cook a bit longer.
-Fry the (6) sliced onions in ¼ C. lard and reserve both.
-Boil the eggs for 3 minutes in boiling water with chili and reserve, warm.
-Serve the iguana in the casserole/serving dish, and drizzle over it the onions and lard. Garnish with the eggs.

Serves 12.

PEACHY KEEN

6shortcake1
Just as soon as the weather turned warm, I became fixated on the idea of grilled peaches. I could picture them in all the glory of their sunset hue; ripe, juicy flesh tattooed with smoky grill marks…a dreamy side to a charred and crispy-skinned chicken leg…
That idyllic snapshot quickly faded when I discovered that the BBQs on our apartment complex’s rooftop are equipped with nothing but a puny electric rod, more similar to an archaic space heater than a grill. I may as well plop my food on top of my toaster oven.

Since grilling was clearly an impossibility, I would poach the peaches. Granted, they would not be branded and flame-licked, but they could still be remarkable, especially as a side to salty, broiled pork loin. Make these peaches for dinner and be sure to throw in a few more for Peachy Keen Shortcakes.
4servewithporkRoasted pork loin with cherry poached peaches and sautéed broccoli rabe.

CHERRY POACHED PEACHES

6 ripe but still firm peaches
3 C. tart cherry juice
2 C. granulated sugar

-In a saucepan, combine cherry juice and sugar and bring to a boil, stirring until sugar is dissolved. Reduce to a low simmer.

-In a pot large enough to accommodate the peaches, bring four quarts of water to boil. In the meantime, set up an ice bath.

-With a paring knife, gently draw a small “X” on the bottom end of the peaches.
1Xyourpeach-Gently slide peaches into the boiling water. Allow about 20 seconds and quickly scoop out into the ice bath with a slotted spoon to stop the cooking.

-This blanch-&-shock process will have loosened the skins. With a delicate hand, pull the skin away from the flesh, starting at the “X” you previously carved.
2blanchandshock-With a small knife, cut the peach in half, tugging at each to reveal the pit: remove and discard. Cut each half in half, lengthwise and slip into the simmering cherry syrup. Poach peaches 15 – 20 minutes and allow to come to room temperature.
3poachNOTE: Peaches are either clingstone, freestone, or semi-freestone. As the name implies, “clingstone” peaches will have flesh that tightly clings to the pit. Removing the fruit from the stone is thus a bit more difficult, so if given the choice, go for the freestone or at least the semi-freestone.

PEACHY KEEN SHORTCAKES
For 2 servings
This recipe is a play on more traditional fruit shortcakes and make a gorgeous brunch item.

4 Best Ever Biscuits (Sweet Variation)
3 cherry poached peaches, at room temperature
1 container Greek yogurt (between 5 – 6 oz), stirred to smooth

-As soon as the biscuits come out of the oven, pull apart into two halves.

-Top bottom half with three peach wedges and drizzle with poaching syrup. Dollop generously with yogurt and cover with the (sugar sprinkled) half.
7shortcake2