Category Archives: Vegetarian

Shameless self promotion

Soy Milk versus Cow’s Milk

SOY MILK is a key alternative for those who do not wish to drink cow’s milk for dietary or ethical reasons, or who cannot do so. The soybean is a plant-based product and is a good alternative to traditional cow’s milk. Most varieties contain thickeners that improve shelf life and give a better consistency.

Soy milk does not contain lactose so is suitable for those with intolerances, does not contain cholesterol and has low saturated fat, which can obviously be detrimental in large amounts. Probiotic or fermented soy milk is useful for those with high blood pressure.

Surprisingly to some people, on the nutritional front soybeans contain as much protein as cow’s milk including calcium and potassium, as well as vitamins A, B12 and isoflavones. On the downside soy can also be an allergen to some people and can cause problems for those with thyroid problems, so care must be taken in these scenarios.

COW’S MILK can now be obtained not just in whole milk form but comes semi-skimmed, skimmed and even lactose free and is a key source of calcium, protein and vitamin D. For nutritional purposes this is particularly pertinent for certain groups such as pregnant women, children under two years old and teenagers. The UK Government’s Eatwell Guide recommends a much lower percentage of dairy intake than in previous publications and includes semi-skimmed or soy milk as healthy options: https://www.gov.uk/government/publications/the-eatwell-guide
However, there are many reasons why a large number of people cannot or do not wish to drink cow’s milk, including allergies, ethical reasons or a need to reduce calories and saturated fat intake.

FROTHING

With coffee consumption on the rise, effective frothing of milk and milk substitutes have become big business. One reason that cow’s milk may not froth effectively is deemed to be detrimental levels of chemicals in milk. In terms of frothing soy milk, this is undertaken by steaming and adding in air bubbles to create a sweet, creamy foam although the quality may potentially suffer.

QUALITY OF LIFE

Taking all of these factors on board, it is important to weigh up the pros and cons of traditional milk versus soy milk when choosing the most appropriate drink, as each individual will have a number of different lifestyle reasons for their choice of one over the other.

I Pita the Fool!

I was flipping channels once upon a Saturday morning and landed on a “Baking with Julia” marathon. A gentleman with a Lloyd Christmas-meets-medieval pageboy haircut was making pita bread, and I thought, why not? I’ve never made pita bread.

PITA BREAD
Adapted from an episode of “Baking with Julia” with guests Jeffrey Alford and Naomi Duguid.
Bread baking is time consuming, so clear your calendar before you start.

2 ½ cups warm (about 110˚F) water
1 teaspoon dry yeast
2 ½ cups whole wheat flour
1 tablespoon kosher salt
1 tablespoon olive oil, plus additional for greasing bowl
About 6 cups unbleached all-purpose flour

– Preheat oven to 200˚F. As soon as it reaches temperature, shut the oven off. Dough likes to rise in warm places, and this guarantees a cozy resting place.

– Place warm water in large bowl. Sprinkle yeast over water and wait for it to dissolve, about 1 minute. Stir in the whole-wheat flour with a wooden spoon. “Stir 100 times in the same direction,” Alford recommended—this will prevent the gluten strands that begin to form from breaking.

– Cover bowl with plastic wrap and let rest in oven, 30 minutes and up to 8 hours.

– Remove bowl from oven and remove plastic. Stir in salt and oil. One cup at a time, start stirring in the all-purpose flour. The dough will absorb different amounts of flour, depending on the day (dough is affected by numerous factors, including humidity – I added about 2 ½ cups flour when I made it). The dough will be sticky and shaggy, but will have some body (see photo 1).

– Turn the dough out onto a clean, dry, and well-floured surface. If you’ve never kneaded dough, here are some pointers: With the heel of your hand, push the dough away from you, firmly, as if you were scrubbing clothes the old-fashioned way, on a wooden plank. Fold the far end of the dough towards you, then turn it counter-clockwise, and repeat action.

– Now you’re ready: Begin kneading, adding more flour as necessary, until the dough has “a certain tension,” about 10 minutes (see photo 2). Normally, I would say the finished dough will have a smooth, satiny texture, but the whole wheat flour makes this dough a bit more like coarse leather. It will be tight, like a firm muscle.

– Place dough in a large, well oiled bowl. Lightly coat the dough with oil. Cover the bowl with plastic and place oven. Allow the dough to rise 2 to 3 hours, until it is doubled in size. An old tip: when the dough is ready, you can poke the dough and your finger’s indentation will remain.

– Preheat oven to 400˚F. If you have a pizza stone, set it on the bottom third the oven. Otherwise, place an inverted rimmed baking sheet in the oven.

– Transfer the dough to a lightly floured surface. With a bench scraper, cut the dough in half. Cut each half into 8 pieces (see photos 3 and 4).

– Roll each piece into a ball. Flatten each ball to about 4 inches in diameter. Then, with a rolling pin, roll it out to about 7 inches in diameter (see photos 5 through 8).

– Carefully transfer 4 to 6 rounds to the pizza stone or baking sheet. The pitas will puff after about 3 minutes. Allow 30 seconds more and remove from oven. Stack pitas together and wrap in a towel to keep warm.

– If you don’t want to use all the dough, save half and refrigerate. Use the next day. Alternatively, use it all, cool the pitas, and store them in plastic Ziploc bags in the freezer. Pop in the toaster or oven when you’re ready to eat them.

An Aside: Brussels Sprouts with Sticky Fig Glaze

I get into a cooking slump sometimes, especially when I come home late after work and yoga and don’t want to deal with cooking or cleaning up. But I gotta eat. And so does O. Although he’s pretty good about feeding himself when I don’t make dinner, one of my (many, many, many) pet peeves is when I see people eating cold leftovers  (please at least microwave your disgusting, plain, under-seasoned chicken cutlets before you eat them! – You know who you are).  Also, there was a container of Brussels sprouts lurking in my fridge that I had to make or throw out.

Admittedly, these don’t look radiant and green as a spring pasture after a light rain, but they’re really delicious – roasted, mildly bitter, with a sticky, sweet slick of glaze – and pair nicely with that rubbery chicken.

ROASTED BRUSSELS SPROUTS with STICKY FIG GLAZE
Serves 2

12 ounces (about 3 cups) Brussels sprouts, ends trimmed, outer leaves removed, and halved lengthwise
¼ cup olive oil
Kosher salt and pepper
1 shallot, thinly sliced
2 tablespoons fig spread or jam
1 teaspoon grainy mustard

– Preheat oven to 425˚F.

– Spread sprouts out on a rimmed baking sheet. Sprinkle with ½ teaspoon salt and 1/8 teaspoon pepper and drizzle with 2 tablespoons olive oil. Toss together with hands to ensure they’re evenly coated.

– Roast sprouts until they’re tender and lightly charred on the edges and areas where they make contact with the baking sheet, 15 to 20 minutes.  Place baking sheet on cooling rack and cover with foil.

– Heat the remaining 2 tablespoons olive oil in a medium skillet over medium heat until shimmering. Add the shallot and cook until softened, about 3 minutes. Stir in the fig spread and cook until melted, 1 to 2 minutes. Move the skillet off heat and whisk in the mustard. Immediately add the roasted sprouts and toss to evenly combine. Transfer to a serving dish. Serve.

How To…Make Rice

In Nicaragua you get rice three times a day. If there’s no rice, you can’t call it a meal. For breakfast it’s mixed with beans and labeled “gallopinto.” At lunch, it’s served alongside the beans. At dinner, you can have gallopinto or rice and beans. Basically, it’s rice and beans, or riceandbeans. Got it? And you have them with everything. Even if you have pasta, rice and beans will be on the table, never you mind the double-starching.

I make rice fairly often. Nothing says “home” to me as much as a simple dinner with seared steak or a breaded chicken cutlet with a side of fluffy rice. I don’t know how common rice is at the American dinner table, but most people I know are crazy about it, but don’t know how to cook it. Even professionally trained cooks I know confess how inept they are at preparing rice.

This is how I go about the business, and it works beautifully every time.

RICE
Makes 4 to 6 side dish servings
2 tablespoons vegetable oil
½ small onion (about ½ cup), finely chopped
1 cup long-grain white rice
2 cups water or low-sodium chicken broth
1 teaspoon salt
– Heat oil in a medium saucepan over medium heat until shimmering. Add onion and cook, stirring, until softened and translucent, about 5 minutes.
– Add rice and cook, stirring, until grains are shiny and evenly coated with oil, 2 to 3 minutes. Add water or broth and salt, increase heat to high, and bring to a boil.
– Boil rice (do not stir!) until most of the liquid has evaporated and you can see small bubbles bursting on the surface of the rice.
– Immediately reduce the heat to the lowest setting, cover, and cook (do not stir, do not remove lid!) for 15 minutes. Fluff rice with chopsticks or fork and serve.

CHOPPING BROCCOLI

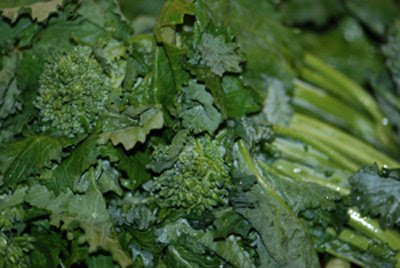
1broccolirawI was out of town the week before last and came home to a near-empty fridge and a series of dinners that I can’t even recall right now, they were so unmemorable. I think there was a lot of cereal. And plain spaghetti.

This dinner lethargy spilled over into the weekend and again, I stared into a vacant ice box. There were some flour tortillas, a tiny tub of mango and red onion salsa (which I have yet to throw away), a container with leftover red bell pepper tops and bottoms, a depleted box of Maison du Chocolat assorted chocolates, vermouth, and a bag of carrots which are starting to sprout monster roots. Not my finest moment. I did, however, have a drawerful of beautiful broccoli rabe which I was determined to eat my way through this weekend. And I did. All 3.5 pounds of it. If you’re wondering how I didn’t get sick of it, see below for the various interpretations of that brash, biting green (which is a relative of the turnip, and not broccoli, if you were wondering):

SATURDAY: Broccoli rabe “fritto” – inspired by the Zuni Café Cookbook

1 bunch broccoli rabe
2 cups flour (unbleached all-purpose or whole wheat)
1 cup cornmeal
2 cups plain yogurt
vegetable oil
salt & pepper

-In one shallow dish, spread out the flour and cornmeal and combine well. Pour the yogurt into another shallow dish and season generously with salt and pepper.
-Heat about two inches of vegetable oil in a frying pan over medium-high heat.
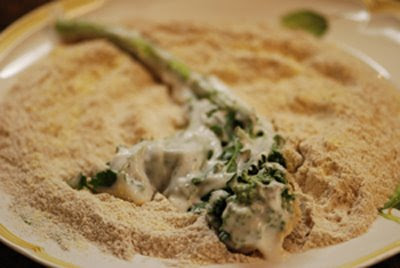
-Meanwhile, one at a time, dunk each stalk of broccoli rabe into the yogurt then coat with the flour mix. Lay the coated broccoli on a baking rack.
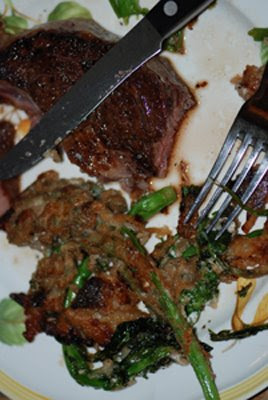
2coatedOnce all the broccoli rabe is coated, fry until golden in the hot oil. Make sure the broccoli bubbles somewhat violently when you place it in the oil: if you try in cool oil you’ll have a wilted, soggy mess. Also, don’t overcrowd the pan.
Transfer the fried broccoli rabe to a paper towel-lined plate and sprinkle with salt.
Serve.

3friedSUNDAY: Broccoli rabe with toasted bulgur wheat and dates

1 cup bulgur wheat
2 cups water
olive oil
1/3 cup dried dates, chopped
1 bunch broccoli rabe
2 garlic cloves
½ teaspoon red pepper flakes
salt & pepper
anchovy fillets (optional)

-Set water to boil in a large pot.
-Separately, in a small saucepan, start the wheat. Heat about 1 tablespoon olive oil over medium-high heat. Add the bulgur wheat and cook, stirring, until deep golden and toasty. Add dates, 1 teaspoon salt, a few generous grindings of pepper, and water. Boil until the wheat’s surface is visible, reduce the heat to low, cover, and cook until all water is absorbed, about 15 minutes. Set aside.
-Cook broccoli rabe in boiling water with 1 tablespoon salt until tender, 2 to 3 minutes. Drain, run under cold water until cool enough to handle, drain again, and transfer to a cutting board. Coarsely chop broccoli rabe.
-Heat 2 tablespoons oil in a large skillet over high heat. Add garlic and red pepper flakes and cook, stirring, 1 to 2 minutes. Add broccoli rabe and sauté until heated through, about 3 minutes. Season with salt and pepper.
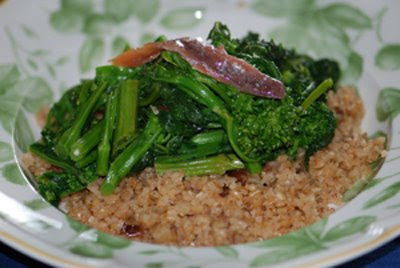
-Serve broccoli rabe atop bulgur wheat. Top wih anchovy fillet.

4withdatesMONDAY: Broccoli rabe, bacon, and cannellini bean pasta
5bacon

2 strips good bacon
½ teaspoon red pepper flakes
olive oil
2 garlic cloves, finely sliced
1 15-oz. can cannellini beans, drained
1 bunch about 12 oz. broccoli rabe
8 oz. angel hair / cappellini pasta

-Set water plus 1 tablespoon salt to boil in a large pot.
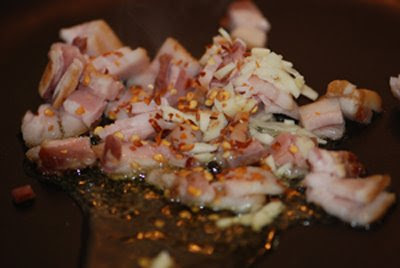
-Heat 1 tablespoon oil in large skillet over medium heat. Add bacon, garlic, and red pepper flakes and cook, stirring, until bacon is cooked through. If bacon begins to burn, lower the heat.
-Cook broccoli rabe in boiling water until tender, 2 to 3 minutes. Do not drain water: transfer broccoli rabe with tongs to colander set over large bowl. Run broccoli rabe under cold water until cool enough to handle, drain again, and transfer to a cutting board. Coarsely chop broccoli rabe.
-Add cannellini beans to bacon skillet and cook 2 to 3 minutes. Add the broccoli rabe and cook until heated through, about 3 minutes. Season with salt and pepper.
-Add pasta to boiling water and cook until al dente. Reserve ¼ cup of cooking water, then drain pasta and return to pot. Add 2 tablespoons olive oil, reserved water, and broccoli rabe mixture. Toss to coat and serve with grated parmesan.

DSC_0111


CORN OFF THE COB

1corn

Sinking your teeth into the sweet, tender crunchiness of a fresh ear of corn is one of summer’s indubitable pleasures, the butter-slathered kernels yielding to your eager bite, the salt crusting your upper lip. For many of us, that first bite acts as a time machine, transporting us to the county fair or the Sunday afternoon backyard barbecue of our youth. My corny time machine takes me to Reino Aventura, a Six Flags-like amusement park in Mexico City where I had a Corn on the Cob, The Extreme Version: grilled corn generously schmeared with mayonnaise, sprinkled with grated cheese and chile piquín, and finished off with a squirt of lime.

But, regardless of whether it’s consumed in English or en español, nibblers will agree that eating corn on the cob has some unattractive side effects; bits and pieces of kernel stubbornly fix themselves in our gums, between our canines, incisors, and molars, making our faces contort and twitch as we not-so-discreetly attempt to dislodge them with the tips of our tongues. Even in the comfort and privacy of my own home, I can’t stand the struggle.

So, the other day when I was craving Mexican street corn, I decided I’d deconstruct the local treat and serve it forth in a bowl. It would be a much more Emily Post-ish eating experience, besides which I would be able to get larger mouthfuls (not so Emily Post, in the end).

Though versions abound, this is my recipe for Mexican Corn Off the Cob. Serve it as a side dish to grilled steak, fajitas, or as a topping for quesadillas.

MEXICAN CORN OFF THE COB
Serves 2 to 3

6 ears of corn, husks and silk removed (yields approx. 3 cups of kernels)
2 tsps. corn oil
2 to 3 TBSP. mayonnaise
Juice of one lime
chile piquín or chile de árbol flakes, to taste
1/3 C. grated cotija cheese

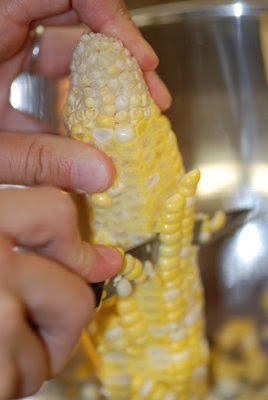
-With a small, sharp paring knife, scrape the kernels off the cob. Work in a large shallow bowl so you can catch the kernels as well as any milk that may leak out.

-Heat oil in a large skillet over high heat until shimmering. Add kernels and toss to coat in oil. Either stir or shake kernels constantly until they are nicely toasted – I prefer mine a bit charred.

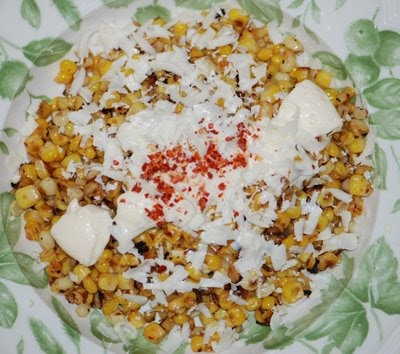
-Pour corn into a serving bowl and season with salt and pepper. Stir in mayonnaise, then sprinkle with chile and cheese. Drizzle with lemon juice and serve.

4decob“De-cobbing.”

RICE-A-RONI

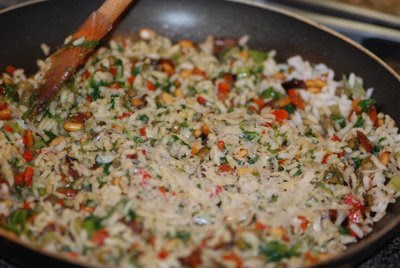
I adapted this from Lidia Bastianich’s recipe for Gourmet. It’s confetti-colorful and pulls together a delicious variety of flavors. I’m ranking it right up there with that Turkish rice concoction I put together a while back. Serve it with roasted pork loin for a spectacular weekday night dinner.

1 large head escarole
¾ C. Arborio rice
½ C. pine nuts
extra-virgin olive oil
2 garlic cloves, finely chopped
1 red peppers, roasted, peeled, and chopped
1/3 C. chopped and pitted dates
3 tablespoons chopped rinsed capers
¼ C. grated Parmigiano-Reggiano
salt + pepper

  • Remove base from escarole and cook in a pot of boiling salted water, about 5 minutes. Drain and refresh, then corsely chop. Set aside.
  • Bring 1 quart water with 1 ½ tsp. salt to a boil in a medium sauce pan. Parboil rice, uncovered, 10 minutes. Reserve 1 C. of the cooking liquid, then drain rice in a sieve.
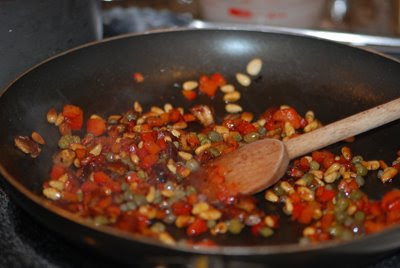
  • Cook pine nuts in some olive oil over medium heat, stirring, until golden.
  • Add chopped roasted pepper and chopped pitted dates and continue to cook, stirring, about 4 minutes.
  • Add capers, minced garlic, and chopped escarole and cook for an additional 3 minutes.
  • Add rice, mixing well with ingredients, and some of the reserved cooking liquid if rice is too firm. Cook on low heat for a few additional minutes to allow flavors to meld.
  • Adjust seasoning and mix in grated cheese.

1_002

I decided to roast my own red pepper rather than use the jarred variety – just personal preference.

2

3_002
Grated cheese will melt nicely into rice. Add right before serving.


4
Serve with something un-fussy. This pork loin was seasoned with salt and pepper only.